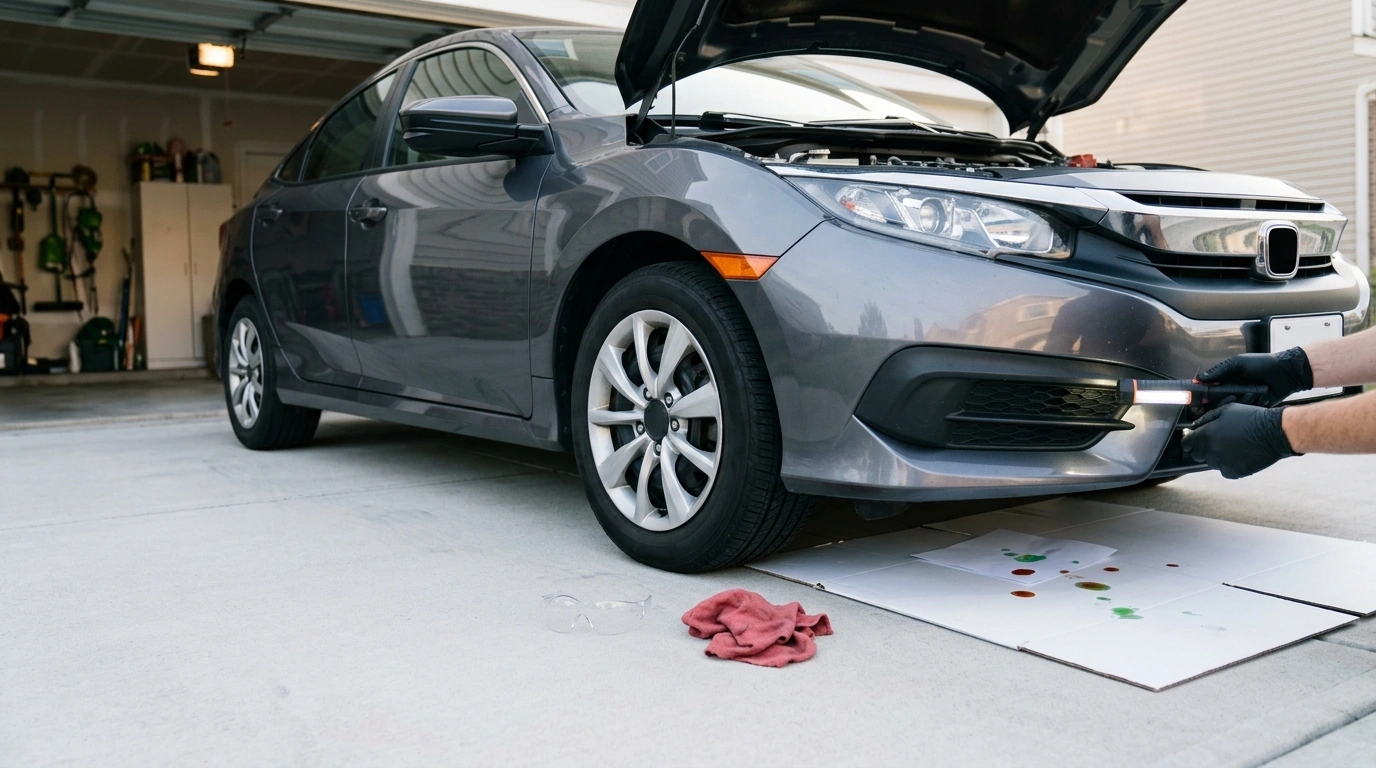
A fresh spot under a parked car can be harmless condensation—or an early warning for a costly failure. A quick color-and-location check can narrow down what’s leaking, then a few safe confirmation steps help you decide whether it’s a simple top-off, a DIY repair, or time to call a shop.
Start with color, then confirm using smell, texture (between gloved fingers), and where the drip lands under the car. Keep in mind that airflow and underbody panels can make a leak “travel” before it drips.
| Fluid (most common) | Typical color | Texture / smell | Common drip location | What to do first |
|---|---|---|---|---|
| Engine oil | Amber to dark brown/black | Slick, oily; mild burnt smell if old | Front/center under engine | Check dipstick; inspect drain plug, filter, valve cover area |
| Coolant/antifreeze | Green, orange, pink, blue (varies) | Watery; sweet smell | Front of car; radiator area; under hoses | Check reservoir level; look for crusty residue at hose joints |
| Transmission fluid | Red/pink (fresh), brown (old) | Oily; can smell sharp/burnt | Mid-front under transmission | Check level per owner’s manual; inspect pan gasket and cooler lines |
| Power steering fluid | Clear to amber (sometimes reddish) | Oily; petroleum smell | Front near steering rack/pump | Check reservoir; inspect return/pressure hoses and clamps |
| Brake fluid | Clear to yellow/brown | Thin; slightly slippery but not thick | Near wheels, under master cylinder area | Check brake fluid reservoir; if low or pedal soft, do not drive |
| Fuel (gasoline) | Clear to pale yellow | Strong gasoline smell; evaporates quickly | Along fuel line path; rear/mid common | Do not start car; ventilate area; tow for repair |
| A/C condensate (water) | Clear | Watery; no odor | Passenger-side firewall area | Normal if A/C has been running; confirm it’s odorless water |
Use cardboard or white paper to see the true color. Take a quick photo (including where the spot sits relative to the front wheels) so you can compare later.
Check levels with the correct procedure for your vehicle and conditions. Oil level is checked with a dipstick; coolant is checked at the reservoir (and only open a radiator cap when fully cool); brake fluid is checked at the master cylinder reservoir.
As a fast rule: front/center often points to engine oil or coolant; mid-front can be transmission; near a wheel suggests brake fluid; rear/mid can be fuel or (on some vehicles) differential fluid.
Fluids rarely drip straight down from the source. They can run along splash shields, subframes, or hose routing, so the puddle may appear behind the leak by several inches (or more at highway speeds).
With the engine off and cool, clean the suspected area using a safe degreaser, rinse/wipe, and dry. After a short drive, inspect again: new wetness at a seam, fitting, or gasket edge usually points to the source.
For maintenance reminders and safety-related updates tied to your vehicle, check NHTSA’s vehicle recall and safety resource. For general upkeep guidance, Car Care Council is a solid reference.
A color-based approach works best when it’s paired with simple confirmation checks: fluid level, smell/texture, drip location, and fresh wetness after cleaning. For a printable walkthrough and a quick color reference you can keep with your maintenance notes, this download is a convenient option: Identifying Car Fluid Leaks: A Step-by-Step Guide to Spotting and Fixing Leaks by Color (eBook Download).
If you’re putting together a basic “messy jobs” kit for the garage or trunk, having dedicated work clothes can also help you handle inspections without ruining everyday outfits: Levi’s Men’s Blue Slip-On Jeans with Worn-Out Effect.
Most often it’s transmission fluid or power steering fluid. Check the transmission level (if applicable for your vehicle) and the power steering reservoir, then use drip location as a clue: mid-front commonly points to transmission, while front near the steering rack/pump often points to power steering.
No. If it’s odorless water and appears after running the A/C, it’s usually normal condensate draining near the passenger-side firewall. If it has an odor, oily feel, or shows up without A/C use, investigate further.
It’s risky because coolant loss can accelerate suddenly and overheating can cause severe engine damage. If the level is dropping or there are visible drips, limit driving and repair promptly; tow the vehicle if it begins to overheat.






Leave a comment